
14 Stunning Kitchen Renovations Under $500 (You'll Be Shocked by #5!)
Are you dreaming of a kitchen makeover but worried about budget constraints?
Look no further! This article showcases 14 stunning kitchen renovations that can be accomplished for under $500, proving that style and functionality can coexist without breaking the bank.
From innovative DIY hacks to clever repurposing ideas, each renovation will inspire you to transform your kitchen into a space you love. Get ready to be amazed—especially by the jaw-dropping #5!
1. Painted Cabinets for a Fresh Look
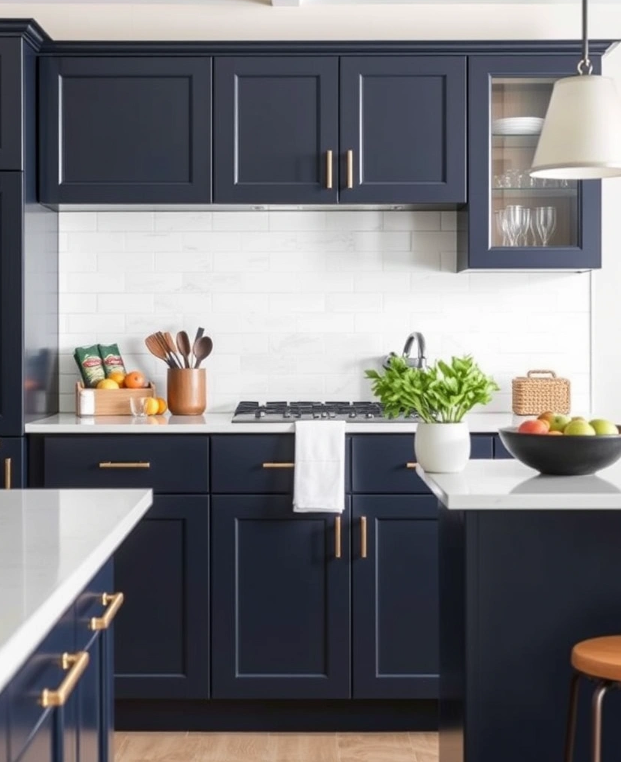
Give your kitchen a brand-new vibe by simply painting your cabinets.
Choose a bold color like navy blue or a soft pastel shade to refresh the space and create a dramatic effect. Painting cabinets is an accessible DIY project; with a little sandpaper, primer, and a high-quality paint brush, you can achieve salon-worthy results. Don’t forget to replace old hardware with trendy knobs or handles for an added touch of elegance.
Materials:
- Sandpaper (120 and 220 grit)
- Primer (stain-blocking, for cabinets)
- High-quality paint (satin or semi-gloss finish)
- Paintbrush (angled for corners and a wider one for flat surfaces)
- Paint roller (optional, for larger areas)
- Old rags or cloths (for dusting and cleaning)
- New cabinet knobs or handles
- Screwdriver (for hardware replacement)
Instructions:
1. Preparation: Start by emptying your cabinets and removing all hardware. Use your screwdriver to take off knobs and hinges.
2. Cleaning: Wipe down the surfaces with a damp cloth to remove grease and dirt. Allow the cabinets to dry completely.
3. Sanding: Lightly sand the cabinet surfaces using the 120 grit sandpaper. This helps the primer adhere better. After sanding, wipe down with a damp cloth to remove dust.
4. Priming: Apply a coat of primer using your paintbrush or roller. Make sure to cover all surfaces evenly. Allow it to dry according to the manufacturer’s instructions.
5. Painting: Once the primer is dry, apply your chosen paint color. Use the angled brush for corners and edges, and a roller for flat surfaces. Apply at least two coats for a rich color, allowing each coat to dry completely.
6. Finishing Touches: After the final coat of paint has dried, attach your new hardware. This can dramatically change the overall look of your cabinets.
7. Reassemble: Finally, place everything back in the cabinets and enjoy your newly renovated kitchen!
This budget-friendly makeover will breathe new life into your space without breaking the bank.
Product Recommendations:
• Sandpaper set
• Stain-blocking primer
• High-quality satin paint
2. Open Shelving to Maximize Space

Open shelving is not only functional but also adds a modern touch to your kitchen.
By removing upper cabinets and replacing them with wooden or metal shelves, you can create an airy feeling and display your favorite dishes and decor items. This renovation invites creativity; mix and match your tableware with plants and cookbooks for an aesthetically pleasing arrangement. Make sure to secure the shelves properly and keep the items minimal for a clean look.
If you're considering a DIY kitchen renovation on a budget, here’s a simple recipe to get you started on your open shelving makeover.
Materials:
- Wooden or metal shelves (choose your desired length and thickness)
- Brackets for mounting shelves (ensure they can support the weight)
- Wood stain or paint (if you want to customize the look)
- Sandpaper
- Stud finder
- Level
- Drill
- Screws
- Measuring tape
- Paintbrush (if painting or staining)
- Decorative items (dishes, plants, cookbooks, etc.)
Instructions:
1. Measure Your Space: Use the measuring tape to determine the ideal length and height for your shelves. This will help you decide how many shelves you want and where to place them.
2. Choose Your Shelves: Select wooden or metal shelves that fit your aesthetic. If you’re going for a rustic look, consider reclaimed wood.
3. Prepare the Shelves: If you want to paint or stain your shelves, sand them down first to create a smooth surface. Apply your chosen finish and let it dry completely.
4. Locate the Studs: Use a stud finder to locate the wall studs where you’ll be attaching the brackets. This ensures your shelves will be securely mounted.
5. Install the Brackets: Mark the desired height for your shelves, then attach the brackets to the wall using a drill and screws, ensuring they are level.
6. Place the Shelves: Once the brackets are securely mounted, carefully place your shelves on top.
7. Style Your Shelves: Start arranging your items. Use a mix of dishes, plants, and cookbooks to create visual interest. Keep it minimal for a clean look.
8. Secure Everything: Ensure that everything is stable and won’t easily tip over. Adjust your arrangement as needed for balance.
By following these steps, you can achieve a stunning open shelving look in your kitchen without breaking the bank. Enjoy your new space!
Product Recommendations:
• Heavy Duty Shelf Brackets
• Paint and Stain Set for Wood Projects
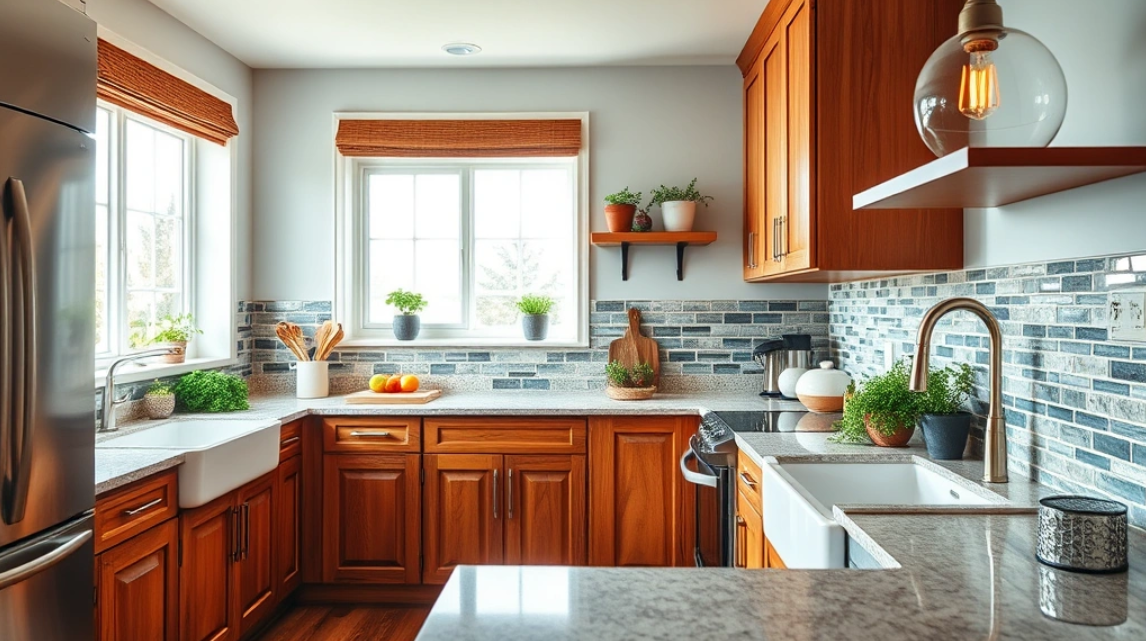
3. Eye-Catching Backsplashes

Transforming your kitchen with a striking backsplash can create a dramatic focal point without breaking the bank. Whether you opt for peel-and-stick tiles for an easy upgrade, classic subway tiles for a timeless look, or a bold mosaic pattern to make a statement, this project is perfect for DIY enthusiasts. With just a few tools and some creativity, you can elevate your space and enhance its style.
To make this project even more rewarding, consider pairing your new backsplash with complementary countertops and accessories that harmonize with your design theme. Here’s a simple guide to help you achieve a stunning backsplash makeover.
Materials:
- Peel-and-stick tiles or traditional tiles (subway or mosaic)
- Tile adhesive (if using traditional tiles)
- Grout (if using traditional tiles)
- Tile cutter or utility knife
- Level
- Measuring tape
- Spacers (for traditional tiles)
- Grout float (for traditional tiles)
- Sponge
- Sealant (if needed)
Instructions:
1. Measure the Area: Start by measuring the space where you want to install the backsplash. This will determine how many tiles you need.
2. Choose Your Tiles: Select the type of tiles you want to use, whether peel-and-stick or traditional. Consider colors and patterns that complement your kitchen decor.
3. Prepare the Surface: Clean the wall surface where the backsplash will be installed. Make sure it’s dry and free of dust or grease.
4. Cut Tiles (if necessary): If you're using traditional tiles, cut them to fit around outlets or corners using a tile cutter or utility knife.
5. Start Installation: For peel-and-stick tiles, simply peel the backing and press them onto the wall. For traditional tiles, apply a layer of adhesive to the wall and set the tiles in place, using spacers to maintain even gaps.
6. Grout (if applicable): If you're using traditional tiles, once the adhesive has dried, apply grout between the tiles with a grout float. Wipe away excess grout with a damp sponge.
7. Seal the Grout: After the grout has cured, apply a sealant to protect it from moisture and stains.
8. Finishing Touches: Clean the tiles and remove any residue. Stand back and admire your beautiful new backsplash!
With these steps, you can achieve an eye-catching backsplash that transforms your kitchen into a stylish and inviting space—all while sticking to your budget.
Product Recommendations:
• Tile Cutter
• Grout Float Tool
4. Budget-Friendly Lighting Fixtures

Replacing old lighting fixtures can transform your kitchen's look and feel without breaking the bank. Consider sleek pendant lights or an elegant chandelier to create a focal point that draws the eye. For an even more affordable option, keep an eye out for unique finds at thrift stores or browse online marketplaces.
Additionally, adding under-cabinet lighting not only enhances the functionality of your kitchen but also provides a warm and inviting glow during evening hours. This simple upgrade can make your space feel more cozy and stylish, elevating your kitchen renovations to a whole new level.
Materials:
- 2-3 modern pendant lights or a chic chandelier (budget-friendly options)
- LED under-cabinet lighting strips
- Light switch dimmer (optional)
- Ceiling hooks (if needed for pendant lights)
- Basic tools (screwdriver, drill, level)
- Wire connectors (if applicable)
- Tape measure
Instructions:
1. Choose Your Fixtures: Select pendant lights or a chandelier that complements your kitchen style. Check thrift stores, garage sales, or online marketplaces for affordable options.
2. Measure Your Space: Use a tape measure to determine where you want to install your new lighting. Make sure the pendant lights hang at an appropriate height above your countertops or dining area.
3. Turn Off Power: Before beginning any electrical work, turn off the power at the circuit breaker to ensure safety.
4. Remove Old Fixtures: Carefully take down your existing light fixtures, ensuring you disconnect the wiring properly. Keep the screws and mounting hardware for the new fixtures.
5. Install New Fixtures: Follow the manufacturer’s instructions to install your new pendant lights or chandelier. Secure them with the provided hardware and connect the wiring using wire connectors.
6. Add Under-Cabinet Lighting: Measure and cut under-cabinet lighting strips to fit your space. Peel off the backing and stick them in place, or use screws for added security.
7. Connect Power: If you opted for a dimmer switch, install it according to the instructions. Otherwise, reconnect the power to your fixtures and turn on the circuit breaker.
8. Test Your Lights: Turn on your new lights and enjoy the ambiance! Make adjustments as necessary to ensure they are at the perfect height and brightness.
9. Finalize Decor: Consider adding decorative elements around your new lighting to enhance the overall aesthetic, such as plants or stylish kitchenware.
With these steps, you can achieve a stunning kitchen makeover that not only looks great but also fits within your budget.
Product Recommendations:
• Modern pendant lights
• LED under-cabinet lighting strips
• light switch dimmer.
5. A Stunning DIY Kitchen Island

Creating your own kitchen island can be a rewarding DIY project that elevates both the style and functionality of your space. Whether you start with a simple wooden cart or repurpose an old piece of furniture, the possibilities are endless. You can customize the finish to match your cabinets or choose a butcher block top for a warm, rustic feel. This budget-friendly makeover not only provides extra storage and workspace but also becomes a charming focal point in your kitchen that will surely impress your guests.
Materials:
- A wooden cart or repurposed furniture piece (like an old dresser or table)
- Sandpaper (if refinishing)
- Paint or stain to match your cabinets
- Butcher block top or a solid wood countertop (optional)
- Clear sealant (if using wood)
- Drawer pulls or handles (optional for added style)
- Storage bins or baskets (for organizing)
- Wheels (optional for mobility)
Instructions:
1. Choose Your Base: Select a wooden cart or furniture piece that fits your kitchen space. Ensure it’s sturdy enough to serve as an island.
2. Prep the Surface: If refurbishing, sand down any rough spots and remove old paint or varnish to create a smooth surface.
3. Paint or Stain: Apply your chosen paint or stain to match your kitchen decor. Allow it to dry completely.
4. Add a Top: If you want a butcher block look, measure and cut your wood to fit the top of the cart or furniture. Secure it in place using screws or wood glue.
5. Seal the Surface: For added durability, apply a clear sealant over the wood to protect it from spills and stains.
6. Install Hardware: If desired, add drawer pulls or handles for functionality and style.
7. Organize Storage: Incorporate storage bins or baskets on shelves or inside drawers to keep your kitchen essentials tidy.
8. Mobility Option: If you opted for wheels, attach them to the base for easy movement around your kitchen.
9. Final Touches: Style your island with decorative items, cookbooks, or a small plant to enhance its appeal.
10. Enjoy Your New Space: Set up your island and start enjoying the extra workspace and storage it provides!
This DIY kitchen island is not only a practical addition but also a stylish element that reflects your personal taste.
Product Recommendations:
• Butcher Block Countertop
• Adjustable Height Kitchen Stools
• Clear Wood Sealant
6. Unique Wall Art
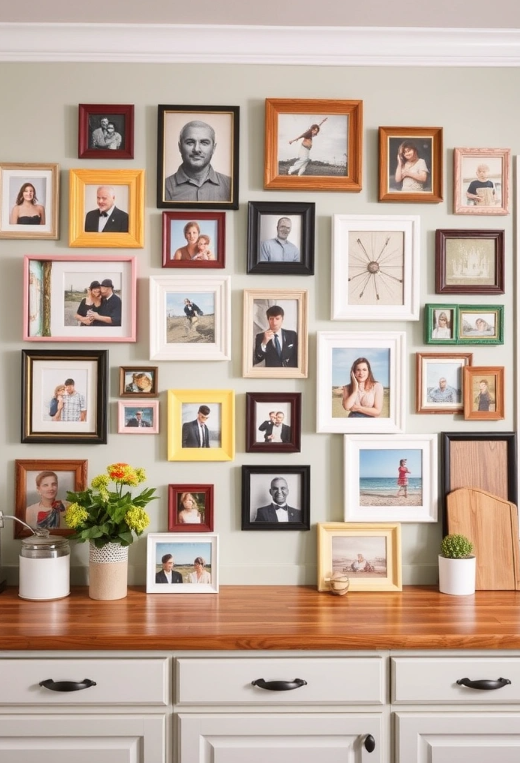
Personalize your kitchen with unique wall art that reflects your style.
Create a gallery wall using framed prints, family photos, or even your own artwork. Consider using a mix of frame styles and sizes for an eclectic look. This renovation is budget-friendly and can be easily updated as your tastes change, allowing your kitchen to evolve with you.
Materials:
- Variety of framed prints or artwork (can be purchased or printed at home)
- Family photos (printed in various sizes)
- Assorted frame styles (wood, metal, vintage)
- Picture hanging strips or nails
- Level and measuring tape
- Optional: a backdrop color (paint or wallpaper)
Instructions:
1. Select Your Art: Gather a mix of framed prints, family photos, and any personal artwork you have. Aim for a harmonious blend of colors and styles.
2. Choose Frame Styles: Collect different frame styles and sizes. This eclectic approach adds character and interest to your gallery wall.
3. Plan Your Layout: Before hanging, lay out your frames on the floor to visualize the arrangement. Consider balance and spacing between each piece.
4. Measure and Mark: Use a measuring tape to determine the height and spacing for each frame. Mark the spots on the wall where each frame will go.
5. Hang the Frames: Start hanging your frames using picture hanging strips for easy adjustments or nails for a more permanent solution. Use a level to ensure everything is straight.
6. Add a Backdrop (Optional): If desired, paint or apply wallpaper to the wall behind your gallery to make the artwork pop.
7. Update as Needed: As your style evolves, swap out artwork and photos easily, keeping your kitchen feeling fresh and personal.
This DIY kitchen makeover can be done on a budget and gives your space a personalized touch that’s sure to impress.
Product Recommendations:
• Gallery wall frame set
• Removable wallpaper
7. Stylish Rugs for Comfort

Adding a stylish area rug to your kitchen can instantly enhance the space, bringing warmth and comfort while also serving a practical purpose. A durable, washable rug is ideal for this high-traffic area, capable of handling spills and foot traffic with ease. Choose a design that adds a pop of color or pattern to your kitchen, making it feel more inviting and cohesive. A well-placed rug can help define your dining or cooking areas, creating a cozy atmosphere that's perfect for family gatherings or casual meals.
Recipe for a Stylish Kitchen Rug Makeover
Materials:
- 1 durable, washable area rug (size based on your kitchen layout)
- 1 rug pad (to prevent slipping)
- Optional: Fabric paint or dye (for custom patterns)
- Optional: Stencils or tape (for design application)
Instructions:
1. Select Your Rug: Choose a durable, washable rug that matches your kitchen's color scheme or desired aesthetic. Consider patterns that can hide stains while still being stylish.
2. Prepare the Space: Clean the area where the rug will be placed. Ensure the floor is dry and free from debris.
3. Add a Rug Pad: Place a non-slip rug pad under the rug for added safety and comfort. This will help keep the rug in place and protect your floors.
4. Position the Rug: Lay the rug in your preferred area, whether that's under the dining table or in front of the sink. Adjust until you're satisfied with its placement.
5. Customize (Optional): If you want a unique look, use fabric paint or dye to create custom patterns on the rug. Stencils or tape can help you achieve clean lines and shapes.
6. Maintain Your Rug: Regularly wash your rug according to the manufacturer's instructions to keep it looking fresh and vibrant.
7. Enjoy Your Cozy Kitchen: Step back and admire your stylish new addition, knowing it has transformed your kitchen into a more inviting and comfortable space.
Product Recommendations:
• Durable washable area rug
• Non-slip rug pad
• Fabric paint for custom designs
8. Refresh Your Countertops

When it comes to giving your kitchen a fresh look, countertops can make a significant impact. If replacing them entirely is beyond your budget, refinishing or painting is a fantastic alternative that can completely transform the space.
Using countertop paint kits or adhesive laminate allows you to achieve a stylish and modern appearance without breaking the bank. Designs that mimic marble or granite can elevate the overall aesthetic of your kitchen, making it look luxurious on a budget. With some creativity and effort, your old countertops can shine like new and enhance your kitchen renovations.
Materials:
- Countertop paint kit (choose a color of your choice)
- Adhesive laminate (if preferred)
- Sandpaper (medium and fine grit)
- Primer (optional, depending on paint choice)
- Paintbrush or roller
- Clean cloth
- Clear sealer (optional for added durability)
Instructions:
1. Preparation: Clear the countertops of all items and thoroughly clean the surface to remove any grease or grime.
2. Sanding: Use medium-grit sandpaper to lightly sand the surface of the countertops. This helps the paint adhere better. Follow up with fine-grit sandpaper for a smooth finish.
3. Cleaning Again: Wipe down the sanded countertops with a clean cloth to remove any dust or debris.
4. Priming (if necessary): If your paint requires a primer, apply it according to the manufacturer's instructions and allow it to dry completely.
5. Applying Paint: Use a paintbrush or roller to apply the countertop paint evenly. Work in small sections and follow the manufacturer's guidance for drying times between coats.
6. Adding Laminate (if using): If you opted for adhesive laminate, carefully measure and cut it to fit your countertops. Peel off the backing and apply, smoothing out any air bubbles as you go.
7. Sealing (optional): Once the paint is dry, consider applying a clear sealer for added protection and durability, particularly in high-use areas.
8. Curing: Allow the countertops to cure for the recommended time before placing any items back on them.
With these simple steps, you can achieve a stunning makeover for your kitchen countertops that fits right within your budget!
Product Recommendations:
• Countertop paint kit
• adhesive laminate
9. Upcycled Furniture for Unique Storage
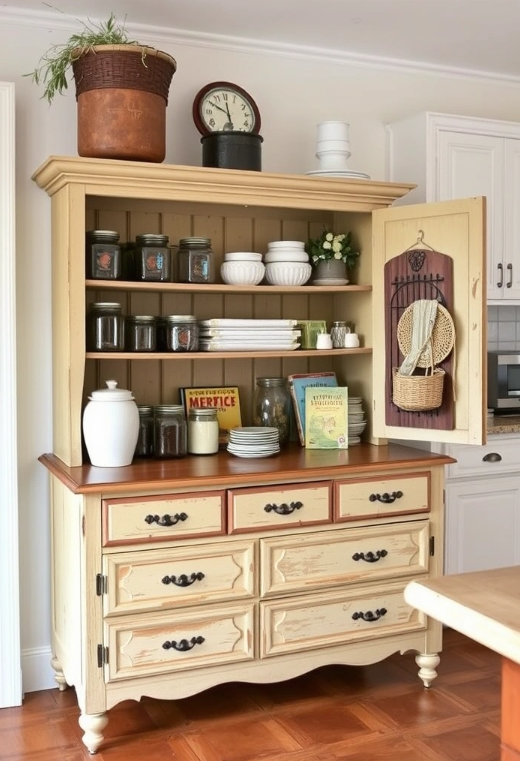
Upcycling old furniture is a fantastic way to create unique storage solutions for your kitchen while staying within your budget. By transforming vintage pieces like dressers and bookshelves, you not only save money but also add a touch of personal charm to your space.
For instance, a vintage dresser can be turned into a delightful pantry. You can store dry goods, canned items, and even kitchen linens in its spacious drawers, all while showcasing its beautiful design. A repurposed bookshelf, on the other hand, can serve as the perfect display for your cookbooks and kitchen gadgets, making them easily accessible.
To get started on your upcycled furniture project, follow these steps:
Materials:
- Old dresser or bookshelf
- Sandpaper (medium and fine grit)
- Primer (optional)
- Paint or wood stain
- Paintbrush or roller
- Sealer (polyurethane or similar)
- Drawer liners (optional)
- Tools (screwdriver, measuring tape, etc.)
Instructions:
1. Select Your Piece: Choose a vintage dresser or bookshelf that fits your style and has the right dimensions for your kitchen space.
2. Prep Your Furniture: Remove any hardware (handles, knobs) and clean the surface. Sand it down to remove old paint or finish, starting with medium grit and finishing with fine grit.
3. Prime (Optional): If you're using a lighter color paint or want to ensure an even finish, apply a coat of primer and let it dry completely.
4. Paint or Stain: Choose a color that complements your kitchen design. Apply paint or stain with a brush or roller, ensuring even coverage, and let it dry according to the instructions.
5. Seal the Finish: Once the paint or stain is dry, apply a sealer to protect the surface. This is especially important for kitchen furniture that may encounter moisture or spills.
6. Reassemble and Organize: Once everything is dry, reattach any hardware and organize your kitchen items in the newly upcycled storage solution. Consider using drawer liners for added protection and style.
7. Add Personal Touches: Decorate the top of your dresser or bookshelf with plants, cookbooks, or decorative jars to enhance the overall aesthetic.
With these steps, you can create a stunning upcycled furniture piece that not only provides functional storage but also makes a stylish statement in your kitchen.
Product Recommendations:
• drawer liner rolls
• polyurethane sealant.
10. Clever Storage Solutions

Maximize your kitchen’s potential with clever storage solutions that keep clutter at bay.
Consider over-the-door organizers, magnetic strips for knives, and pull-out baskets in cabinets. These budget-friendly ideas help you utilize every inch of space while maintaining a clean and organized look. Investing in a few smart storage items can make a world of difference in your kitchen's functionality.
To further enhance your kitchen makeover, why not try your hand at a simple recipe that makes the most of your organized space? Here’s a delicious recipe for a quick and easy pasta dish that’s perfect for busy weeknights.
Product Recommendations:
• Over-the-Door Pantry Organizer
• Pull-Out Cabinet Baskets
11. Fresh Paint for a Complete Makeover

Revitalizing your kitchen doesn’t have to break the bank. One of the simplest and most effective ways to achieve a stunning transformation is with a fresh coat of paint. Not only does it brighten the space, but it can also completely change the ambiance of your kitchen. Whether you opt for soft pastels to create a light, airy feel or make a statement with deep, bold colors, the right paint can elevate your kitchen's style.
To ensure a polished look, don’t forget to paint the ceiling or trim, which will tie everything together beautifully. This project is manageable and can be completed over a weekend, making it an ideal choice for those looking to enhance their kitchen without a hefty investment.
Materials:
- High-quality paint (choose your desired color)
- Primer (if needed)
- Painter's tape
- Paintbrushes and rollers
- Paint tray
- Drop cloths or old sheets
- Sandpaper (for surface prep)
- Clean rags
- Ladder (for ceilings)
Instructions:
1. Prepare the Space: Remove all items from countertops and cabinets. Lay down drop cloths to protect your floors from paint splatters.
2. Clean Surfaces: Wipe down the walls, cabinets, and trim to remove dust and grease.
3. Sand Rough Areas: Lightly sand any rough spots on the walls or cabinets to ensure a smooth finish.
4. Tape Off Edges: Use painter's tape to mask off any areas you don’t want to paint, including trim, windows, and countertops.
5. Prime if Necessary: If you're painting over a dark color or on a surface that tends to absorb paint, apply a coat of primer and let it dry completely.
6. Start Painting: Use a brush for edges and a roller for larger areas. Apply the paint in even strokes, starting from the top and working your way down.
7. Apply Additional Coats: Depending on the color and finish, you may need two or three coats. Allow each coat to dry completely before applying the next.
8. Paint the Ceiling and Trim: Once the walls are done, remove the painter's tape and paint the ceiling and trim to complete the look.
9. Clean Up: Remove all painter's tape carefully and clean your brushes and trays. Dispose of or store any leftover paint properly.
10. Reassemble Your Kitchen: Once everything is dry, return all items to their places, and enjoy your newly refreshed kitchen!
With just a bit of effort, you can achieve a beautiful kitchen makeover that feels brand new and inviting.
Product Recommendations:
• High-quality interior paint
• painter's tape
12. Updated Faucets and Fixtures

Swapping out old faucets and fixtures can dramatically change the look of your kitchen. Consider modern designs with features like pull-down sprayers for added functionality. This upgrade is affordable and can be done in less than an hour, making it a perfect DIY project to enhance your kitchen's style and efficiency.
To get started with your faucet makeover, gather the following ingredients:
Materials:
- New faucet with pull-down sprayer
- Basin wrench
- Adjustable wrench
- Plumber's tape
- Bucket (to catch any water)
- Towels (for cleanup)
- Screwdriver (flathead and Phillips)
- Vinegar and baking soda (for cleaning)
Instructions:
1. Turn Off the Water Supply: Locate the shut-off valves under the sink and turn them off to prevent any leaks.
2. Remove the Old Faucet: Use the basin wrench to loosen the nuts securing the old faucet. Disconnect the water supply lines and lift the old faucet out.
3. Clean the Area: Wipe down the sink surface and remove any residual putty or grime using vinegar and baking soda.
4. Install the New Faucet: Follow the manufacturer’s instructions to position the new faucet. Secure it in place with the provided nuts.
5. Connect Water Supply Lines: Attach the water supply lines to the new faucet, ensuring they are tightly secured using the adjustable wrench.
6. Apply Plumber's Tape: Wrap plumber's tape around the threads of the water supply connections for a watertight seal.
7. Turn On the Water Supply: Gradually turn the shut-off valves back on and check for any leaks.
8. Test the Faucet: Turn on the new faucet to ensure everything is working smoothly and enjoy your refreshed kitchen look!
With just a few tools and materials, you can transform your kitchen with this budget-friendly renovation.
Product Recommendations:
• Delta Faucet Essa Pull Down Kitchen Faucet
• Moen Arbor One-Handle Pulldown Kitchen Faucet
• Kraus KPF-1610SFS Oletto Pull-Down Kitchen Faucet
13. Seasonal Decor Changes

Embrace the beauty of seasonal decor to keep your kitchen feeling fresh.
Switch out dish towels, table runners, and centerpieces to reflect the seasons or holidays. This inexpensive change can instantly uplift your kitchen's vibe. Consider using natural elements like flowers or gourds for a charming touch that brings the outdoors in.
To get started with your seasonal decor changes, here’s a simple guide to creating a lovely centerpiece using seasonal elements.
Materials:
- 1 medium-sized pumpkin (for fall)
- 3-5 small gourds
- A handful of dried flowers or seasonal blooms (e.g., sunflowers for summer, pinecones for winter)
- A decorative bowl or wooden tray
- Greenery (like eucalyptus or ferns)
- Ribbon (optional, for added flair)
Instructions:
1. Begin by selecting a large bowl or tray as your base. This will serve as the foundation for your centerpiece.
2. Place the medium-sized pumpkin in the center of the bowl or tray. This will be the focal point of your arrangement.
3. Surround the pumpkin with small gourds, arranging them in a balanced way for visual appeal.
4. Add the dried flowers or seasonal blooms around the gourds, filling in any gaps to create a lush look.
5. Incorporate greenery to soften the arrangement and add texture. Tuck sprigs in between the gourds and flowers.
6. If desired, tie a ribbon around the base of the pumpkin or the tray for an extra touch of charm.
7. Finally, place your centerpiece on the kitchen table or counter, and enjoy the seasonal vibe it brings to your space!
This simple and budget-friendly makeover can transform your kitchen, making it feel inviting and festive all year round.
Product Recommendations:
• Assorted small gourds
• Seasonal dish towel set
14. Smart Appliances on a Budget

Investing in smart appliances doesn’t have to empty your wallet.
Look for budget-friendly options that offer modern features like energy efficiency and connectivity. Upgrading a few key appliances can enhance your kitchen’s functionality while keeping your budget in check. These appliances not only save time but also add a touch of sophistication to your kitchen.
One way to make the most of your kitchen renovations is by incorporating a simple yet delicious recipe that showcases your upgraded space. Here’s a quick and healthy recipe for a Veggie-Packed Stir-Fry that you can whip up in no time using your new appliances.
Product Recommendations:
• Hamilton Beach Electric Spiralizer
• BLACK+DECKER 2-Slice Toaster Oven.
Conclusion

Revamping your kitchen on a budget is not only possible but can also be a fun and rewarding experience.
With these 14 stunning renovations under $500, you can create a beautiful kitchen that reflects your personal style without the hefty price tag. So, roll up your sleeves and get started on your DIY journey today!